TruEmbroidery™ Software Newsletter March 2014
Welcome to the TruEmbroidery™ newsletter. This month we are focused on making your designs easier to create and locate. You will find helpful information regarding adding Notes to your embroideries so that you can easily locate them at a later time. We will also share some tips to make creating quilting designs quick and easy!
 Icons
Icons
Adding key search words to your embroidery designs is a great way to keep track of who you created the design for, what you did to modify it or any specialty techniques which are included in it, etc. You can also use these words to find a design later using the Finder Application.
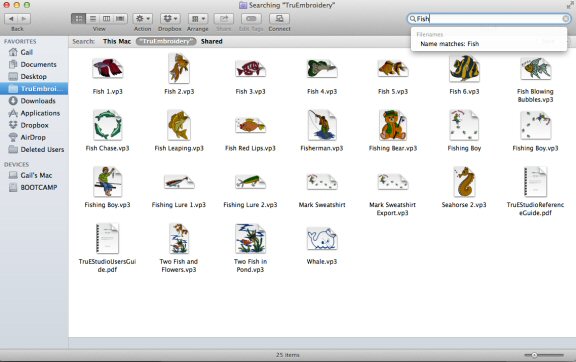
The Finder Application on your Mac® will search not only the name of the design but it will also search the notes area within it. So where do you add Notes?
The Notes section is available in a few locations within the TruEmbroidery™ software:
- Design Tab of the Control Panel in TruE™ Studio
- Design Tab of the Control Panel in TruE™ Modify
- Edit panel in TruE™ Create
To add a note to a design, simply open or select the design then click Edit on the Notes panel. Type in your notes and click OK. When you resave the design the new notes will also be saved.
To search for a design, open Finder. Choose the device or folder you want to search in. Simply start typing the word or phrase you added to the Notes in the Search window. Finder will display all files that contain that word or phrase in the name or in the Notes area of the file.
Once the desired embroidery file is located simply double-click to open it. If it is an embroidery (stitch file) like VP3 it will open in TruE™ Studio. If it opens in TruE™ Modify you can go to the File Menu, select Open with... and select TruE™ Studio. If it is a design file (EDO) it will open into TruE™ Create. (Finder will only search for text in the name of EDO files; however if you enter text in the notes it is automatically added to the embroidery file when you Export Embroidery.)
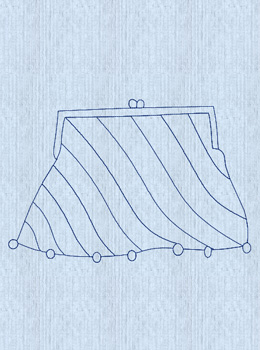
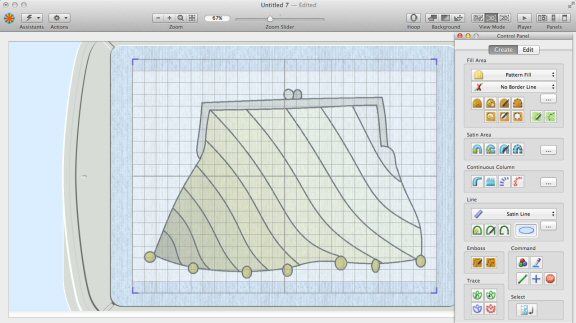
 Tips and Techniques