TruEmbroidery™ 3 Software Newsletter April 2015
Welcome to the TruEmbroidery™ 3 newsletter. This month, look at how to use the Life View feature and how to create fill patterns made from Motifs in TruE™ 3 Create.
 Icons
Icons
Life View ![]() is new to the TruEmbroidery™ 3 Software and can be found in all three applications.
Use Life View to view the embroidery in real-world perspective with the export options set in Configure.
You can see the effects of glow in the dark, solar reactive threads, twin needles, dual thread, and puffy foam.
is new to the TruEmbroidery™ 3 Software and can be found in all three applications.
Use Life View to view the embroidery in real-world perspective with the export options set in Configure.
You can see the effects of glow in the dark, solar reactive threads, twin needles, dual thread, and puffy foam.
In Life View, you can zoom in to see detail, and move and rotate the embroidery in a three-dimensional view. All parts of the embroidery that are within the hoop area are shown, whether or not they are selected. You will see the design with no grid, no stitches selected, or markers displayed, as well as with your choice of special thread effects.
Life View ![]() can be found next to the Design Player on the toolbar. Use the zoom slider to change the magnification of the embroidery. The box below the zoom bar displays the current magnification.
The position
can be found next to the Design Player on the toolbar. Use the zoom slider to change the magnification of the embroidery. The box below the zoom bar displays the current magnification.
The position ![]() slider lets you scroll over to another part of the Life View window.
The rotation
slider lets you scroll over to another part of the Life View window.
The rotation ![]() slider tilts the design to view the stitching in the embroidery in
3D. View the dimensions (Width
slider tilts the design to view the stitching in the embroidery in
3D. View the dimensions (Width ![]() and Height
and Height ![]() ),
the number of stitches
),
the number of stitches ![]() and the number of colors
and the number of colors ![]() in
the embroidery. Use Reset
in
the embroidery. Use Reset ![]() to set Rotation, Position and Zoom back to the
default settings.
to set Rotation, Position and Zoom back to the
default settings.

Use Effects ![]() to change the appearance of an embroidery by showing the effect of using puffy foam, dual threads,
or a twin needle for selected color blocks in the Effects dialog.
to change the appearance of an embroidery by showing the effect of using puffy foam, dual threads,
or a twin needle for selected color blocks in the Effects dialog.
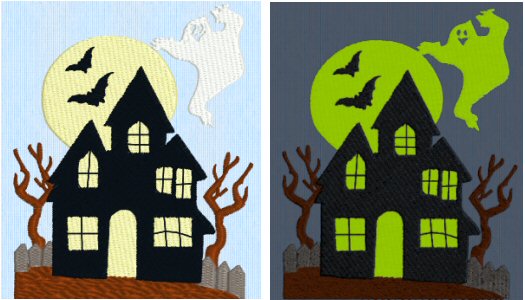
Want to see what that design with glow in the dark thread will look like when the lights go out? Click Glow in the Dark ![]() to view the effect.
The preview darkens to simulate the lights dimming, and the glow in the dark threads are shown in their luminescent colors.
This sample Halloween design can be found in the Studio/Stitch subfolder.
to view the effect.
The preview darkens to simulate the lights dimming, and the glow in the dark threads are shown in their luminescent colors.
This sample Halloween design can be found in the Studio/Stitch subfolder.
Want to see what the design with photochromic threads will look like in the sun? Click Solar Reactive ![]() to view the effect.
The preview simulates the sun shining on the design, and the photochromic threads change shade to show the colors they become in sunlight.
The Daisy design can also be found in Studio/Stitch.
to view the effect.
The preview simulates the sun shining on the design, and the photochromic threads change shade to show the colors they become in sunlight.
The Daisy design can also be found in Studio/Stitch.

Use Play Demo ![]() to animate the preview and show the embroidery at different angles automatically.
Play My Demo
to animate the preview and show the embroidery at different angles automatically.
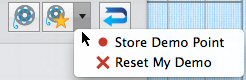
Play My Demo ![]() helps you to animate the preview using your own demo.
Use the menu options to add the current position as a point in the demo, or reset to create a new demo. The My Demo animation is used for Life View in all TruEmbroidery™ 3 Software aplications.
It is stored in the AnimationPath.txt file in the /[User]/Library/ApplicationSupport/VSMSoftware/TruE3/System folder.
helps you to animate the preview using your own demo.
Use the menu options to add the current position as a point in the demo, or reset to create a new demo. The My Demo animation is used for Life View in all TruEmbroidery™ 3 Software aplications.
It is stored in the AnimationPath.txt file in the /[User]/Library/ApplicationSupport/VSMSoftware/TruE3/System folder.
 Tips and Techniques
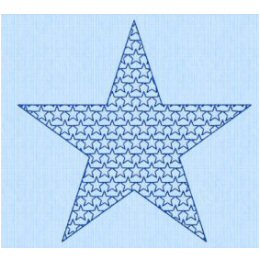
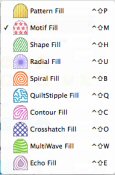
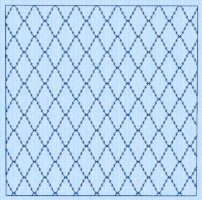
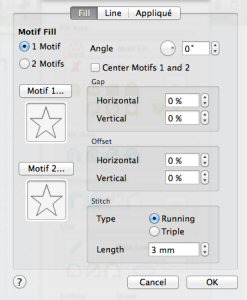 Select Motif Fill in the pop-up menu in the Fill Area section of the Create window, then click the button with the ellipsis (3 dots).
Set the number of motifs in the fill to 1 or 2. If 2 Motifs is selected, a second motif is placed on alternating lines with the first motif.
Select Motif Fill in the pop-up menu in the Fill Area section of the Create window, then click the button with the ellipsis (3 dots).
Set the number of motifs in the fill to 1 or 2. If 2 Motifs is selected, a second motif is placed on alternating lines with the first motif.