TruEmbroidery™ 3 Software Newsletter February 2015
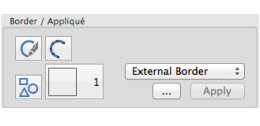
Welcome to the TruEmbroidery™ 3 newsletter. This month, look at how to use SuperDesigns. Then learn about the new Border / Appliqué tools in TruE™ 3 Modify.
 Icons
Icons
SuperDesigns are not new; however, there are 50 new SuperDesigns in the TruEmbroidery™ 3 Software! The SuperDesigns are found in the TruE™ 3 Studio application, available both in TruEmbroidery™ 3 ELEMENTS and TruEmbroidery™ 3 ELITE. They have their own window in the control panel.
A SuperDesign can be resized with constant stitch density, and the stitch properties adjusted, until it is fixed as an embroidery. You can alter the size, proportions, stitch type and thread color.
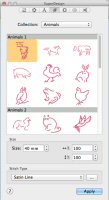
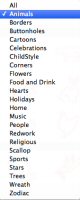
In the SuperDesign window ![]() choose a Collection from the pop-up menu. Then scroll down and choose a SuperDesign set. There are 22 SuperDesign Collections as pictured at right. Each set contains 9 SuperDesigns.
choose a Collection from the pop-up menu. Then scroll down and choose a SuperDesign set. There are 22 SuperDesign Collections as pictured at right. Each set contains 9 SuperDesigns.
A set of SuperDesigns has its own default size. This size is used each time the SuperDesign set is first selected. SuperDesign size can be set from 5mm to 200mm. This is the height of the SuperDesign. Use Stitch Type to alter the appearance of the stitching used in the SuperDesign.
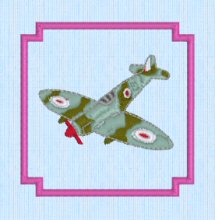
The scene of the little boy fishing is created using one of the new Sets in the Animal Category (Fish 1), Lettering using the Fish Line Type, and a built-in design from the Studio/Stitch2/Leisure subfolder in the TruEmbroidery™ 3 samples folder.
 Tips and Techniques