TruEmbroidery™ 3 Software Newsletter January 2015
Welcome to the TruEmbroidery™ 3 newsletter. This month, learn about how to change properties of a design using the Modify Design tool. Then see the new options for the PhotoStitch Assistant in TruE™ 3 Studio.
 Icons
Icons
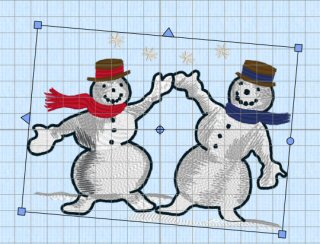
With the Modify Design tool ![]() you can resize and rotate the selected embroidery or see how much the design has been resized or rotated from the original.
The function is found on the Design Window of the control panels in TruE™ 3 and TruE™ Studio.
you can resize and rotate the selected embroidery or see how much the design has been resized or rotated from the original.
The function is found on the Design Window of the control panels in TruE™ 3 and TruE™ Studio.
Click the lock icon in the Modify Design dialog box to adjust dimensions proportionally ![]() or
non-proportionally
or
non-proportionally ![]() .
.
Rotate the embroidery to the desired angle by entering a number in the rotation angle number box, or by using the arrows to increase or decrease the angle of rotation,
or by dragging the rotational slider ![]() to rotate the embroidery.
to rotate the embroidery.
Once a design has been modified, the new angle of rotation is shown by the selection box being rotated. If you resize or rotate again, it is from the original embroidery settings.
 Tips and Techniques