TruEmbroidery™ 3 Software Newsletter June 2015

Welcome to the TruEmbroidery™ 3 newsletter. This month we will share with you how to use the Rotate 45 feature in TruE™ 3 Studio and Command Markers in TruE™ 3 Modify and TruE™ 3 Create.

Flower Icons

icon

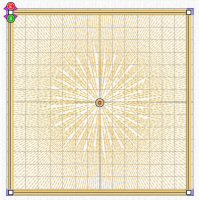
With just one click you can now rotate your design 45 degrees, the exact rotation needed to place a design in a corner. The Rotate 45 Rotate 45 feature is new to the TruEmbroidery™ 3 Software, available both in the TruEmbroidery™ 3 ELITE and TruEmbroidery™ 3 ELEMENTS software packages.

Rotate 45 can be found on the Design Window in TruE™ 3 Studio. Select the design, then simply click on the Rotate 45 icon Rotate 45. It is also in TruE™ 3 Modify.

butterflies

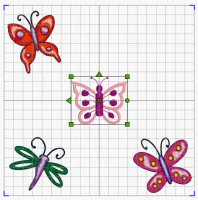
To create a hoop full of butterflies, select three of them from the Samples/Studio/Stitch2/Butterflies and Bugs subfolder, then place them in the corners. Place a fourth butterfly from the Buttonholes 3 Set of SuperDesigns. The buttonhole design would look really nice rotated into the corner. Select the design, then click Rotate 45 Rotate 45. Move the butterfly into place in the corner; and, for a finishing touch, add some lettering.

Flower Tips and Techniques

tips and techniques

Command Markers can be found in TruE™ 3 and TruE™ Modify, as well as TruE™ 3 and TruE™ Create applications. They are available in both the TruEmbroidery™ 3 ELITE and the original TruEmbroidery™ software packages. They help you understand how designs are put together.

On the Design Window in the TruE™ 3 or TruE™ Modify application you can view the Color Change Color command, Stop Stop command, and Trim Trim command Commands. On the Modify Window, you can also remove or add those commands.

On the Object tab you can view and change the start Area Start marker and end Area End marker markers and the origin Origin marker	of a fill pattern. Drag the start or end marker to the point that you wish to use as the new area start or end point. Drop at the desired point.

Some types of fill areas have an origin, marked by an orange circle Origin marker	. This is used to move the start point for the pattern in a pattern fill, or the center point for Radial fill, Spiral fill and Shape fill types.

Radial

In the TruE™ 3 or TruE™ Create Application, the commands work the same as on the Object Window of the TruE™ 3 or TruE™ Modify Application. Let's take a look at the effect that moving the origin has on a design. Create a filled square with Radial Fill and Satin Border. The Origin defaults to the center of the object.

lighthouse

Place a design, like this lighthouse from the Landscapes folder within the Samples/Studio/Stitch2 folder, for one effect. Move the Origin outside the object, to the upper left for a completely different effect, as seen in the lighthouse at the start of this section.

Best wishes from TruEmbroidery™ 3 Software

P.S. Watch for the TruEmbroidery™ 3 newsletter next month when we will look at View Modes and Resize in TruE™ 3 Modify.