TruEmbroidery™ 3 Software Newsletter October 2015
Welcome to the TruEmbroidery™ 3 newsletter. This month we will share with you how to use the Background feature in Studio and how to make your own free-standing lace in Create.
 Icons
Icons
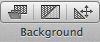
The Background tools are in the TruE™ 3 and TruE™ Studio and the TruE™ 3 and TruE™ Create applications. In Studio, you preview your design on the actual fabric, quilt, or garment before stitching. In Create you use the picture background to digitize the design.
This month we will explore how Loading a Previously Save Background works in Studio. Once loaded, we will look at how to move it around behind your embroidery. There is an assistant to help you load a previously saved background or to bring in a new background. You can also move the background and fade its appearance.
When you add a new background to your collection, you provide a measurement so that it can be matched to the size of your embroideries. The garment, quilt block and fabric backgrounds supplied with TruE™ 3 and TruE™ Studio have already been set to real size. There are 2400+ garment, fabric and quilt block backgrounds included!
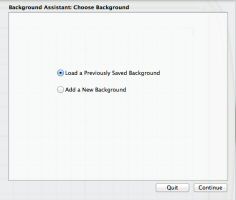
Click on Load Background ![]() to start the Background Assistant. Select whether to Load a Previously Saved Background or
to Add a New Background. Let's look at how to load a Previously Saved Background.
to start the Background Assistant. Select whether to Load a Previously Saved Background or
to Add a New Background. Let's look at how to load a Previously Saved Background.

On the next screen you will select the background in a window that looks like the Finder. Choose whatever method you like to search. The column view is shown here. The design will be stitched out on an apron. The Garments folder has an Aprons folder with many colors to choose from. Once you choose the color apron for your design it will appear, in real size behind your hoop.

Select Move Background ![]() and a four-headed arrow pointer will appear. Click and drag to position the
background behind the hoop where you want the embroidery to stitch. Pictured is a really cute design, from the
Holidays Sample folder, just in time for Halloween. Control-click, then select Finish Move Background to lock it in position.
Select Realistic View
and a four-headed arrow pointer will appear. Click and drag to position the
background behind the hoop where you want the embroidery to stitch. Pictured is a really cute design, from the
Holidays Sample folder, just in time for Halloween. Control-click, then select Finish Move Background to lock it in position.
Select Realistic View ![]() to see your embroidery and background without the hoop.
to see your embroidery and background without the hoop.
 Tips and Techniques