TruEmbroidery™ 3 Software Newsletter August 2016
Welcome to the TruEmbroidery™ 3 newsletter. This month we will review Object Insert ![]() and
Delete Points
and
Delete Points ![]() tools in Modify when editing objects, and some techniques for Object Editing in Modify
tools in Modify when editing objects, and some techniques for Object Editing in Modify
 Icons
Icons
Stitch boundaries around selected areas of stitches sometimes need small adjustments of their points to fine-tune the shaping of the area. You may simply wish to
change the shaping of the area of stitches to give the design a new look.
Use the Insert ![]() and Delete Points
and Delete Points ![]() tools for maximum control.
tools for maximum control.
When you use Object editing and select an area of stitching, you can click and hold a point and drag it into a new location. You can convert a round point to a
square by holding down the FN keyboard key. But sometimes there are simply too many points, or not enough points, to obtain the desired shaping. Then
you can use the Insert ![]() and Delete Points
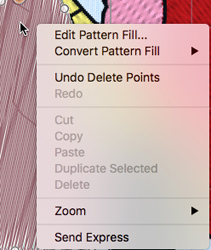
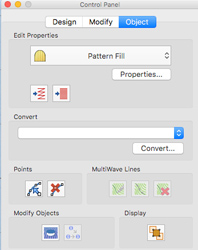
and Delete Points ![]() icons, which are found in the Object Menu
icons, which are found in the Object Menu  in the Control Panel of TruE™ 3 Modify. (Object editing is not available in TruE™ Modify.)
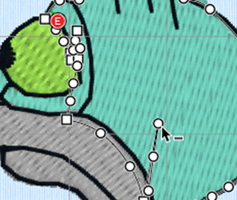
When you select Delete Points ![]() , the cursor displays a minus (-) sign to show you are ready to click points to remove them.
, the cursor displays a minus (-) sign to show you are ready to click points to remove them.
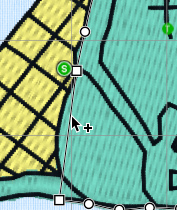
When you select Insert Points ![]() , the cursor displays a plus (+)s sign to show you are ready to click on the perimeter line and add additional points.
, the cursor displays a plus (+)s sign to show you are ready to click on the perimeter line and add additional points.
When you are done inserting and deleting points, simply hold the Control keyboard key and click the mouse to open an alternate menu, and then select Finish Insert Points Tool or Finish Delete Points Tool.
With the advanced editing capability of Object's Point editing, you can make virtually limitless changes to your existing embroidery collection! Learn more about Object editing in the Tips and Techniques section.
 Tips and Techniques
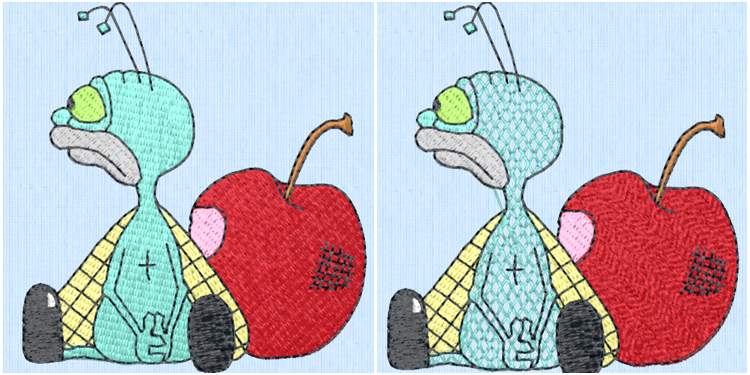
 in the Panels tools in the main toolbar. Once you select the Object Menu, the Object editing tools are
in view, and the cursor changes to the Object Select view
in the Panels tools in the main toolbar. Once you select the Object Menu, the Object editing tools are
in view, and the cursor changes to the Object Select view  . When you click in an area of stitches in Object mode to select the stitches, the area boundary appears and
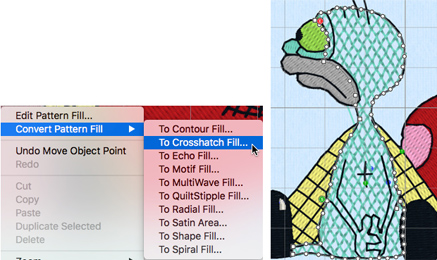
displays the Points that define the boundary shaping for the selected area. Object editing changes the selected stitches from a finished state, ready to stitch, into a
working state that lets you edit the stitch properties, adjust density, convert to a different type of stitches, and more.
. When you click in an area of stitches in Object mode to select the stitches, the area boundary appears and
displays the Points that define the boundary shaping for the selected area. Object editing changes the selected stitches from a finished state, ready to stitch, into a
working state that lets you edit the stitch properties, adjust density, convert to a different type of stitches, and more.