TruEmbroidery™ 3 Software Newsletter February 2016
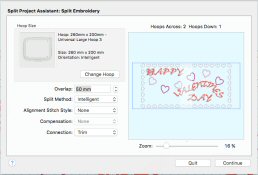
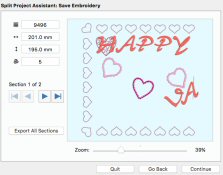
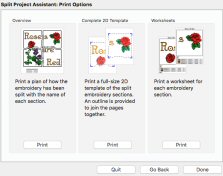
Welcome to the TruEmbroidery™ newsletter. This month we will look at the Design Viewer, and see how to split a large project into multiple files with the Split Project Assistant.
 Icons
Icons
The Design Viewer ![]() makes it easy to find a file for a project. The Design Viewer can be found on the Main Toolbar in all three Applications
in both TruEmbroidery™ and TruEmbroidery™ 3 software. Click the Design Viewer button in the toolbar or choose File > View.
makes it easy to find a file for a project. The Design Viewer can be found on the Main Toolbar in all three Applications
in both TruEmbroidery™ and TruEmbroidery™ 3 software. Click the Design Viewer button in the toolbar or choose File > View.
In the Studio and Modify Applications it helps you find and open .vp3 files. In the Create Application you would open .edo files. Once you have opened the Design Viewer, to view a design folder, click the pop-up menu at the bottom left and browse to the desired folder. Alternatively, click Choose and select a folder in the Open dialog. Click one of the displayed designs to place it in the work area. You can continue to select designs until you close the Design Viewer.
If the viewer is set to Icons Only, hover the pointer over a design thumbnail to view it's name. Scroll to view other designs in the folder.
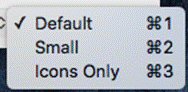
To change the size of the icons in the viewer, click the pop-up menu at the bottom right and select from Default, Small, and Icons Only.
 Tips and Techniques