TruEmbroidery™ 3 Software Newsletter July 2016
Welcome to the TruEmbroidery™ newsletter. This month we will look at Tie On and Tie Off tools in Modify and how to use Filters in Create.
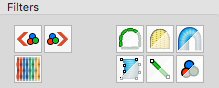
 Icons
Icons
The Tie On ![]() and Tie Off
and Tie Off ![]() tools can be found in the Modify Application on the Modify window in the TruE™ 3 Studio
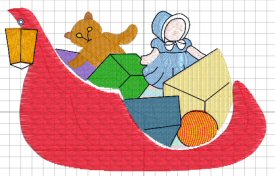
and TruE™ 3 or TruE™ Modify Applications. Create a tie stitch automatically, to hold down the stitching at
the point you click. In this design a Tie Off stitch is shown at the top right of the stitching.
tools can be found in the Modify Application on the Modify window in the TruE™ 3 Studio
and TruE™ 3 or TruE™ Modify Applications. Create a tie stitch automatically, to hold down the stitching at
the point you click. In this design a Tie Off stitch is shown at the top right of the stitching.
Typically, tie stitches are used at the beginning and end of areas of satin or fill. You can add tie stitches to an embroidery where sections are coming loose after stitching out, so it is a very useful tool to improve a design that may not have been perfectly digitized.
Use Insert Tie On Stitch ![]() to add a tie stitch at the beginning of the stitch area to be secured. The stitches making up the tie stitch are inserted in the
embroidery before the first stitch point of the selected stitch.
to add a tie stitch at the beginning of the stitch area to be secured. The stitches making up the tie stitch are inserted in the
embroidery before the first stitch point of the selected stitch.
Use Insert Tie Off Stitch ![]() to add a tie stitch at the end of the stitch area to be secured. The stitches making up the tie stitch are
inserted in the embroidery after the last stitch point of the selected stitch.
to add a tie stitch at the end of the stitch area to be secured. The stitches making up the tie stitch are
inserted in the embroidery after the last stitch point of the selected stitch.
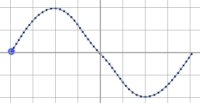
To illustrate how the tool works, we created a simple curved design in TruE™ Create without tie stitches automatically added. After selecting the Tie Off tool, then clicking on the last stitch, you can see that stitches were added to secure the thread. This is shown in the picture at the beginning of the section.
 Tips and Techniques