TruEmbroidery™ 3 Software Newsletter June 2016

Welcome to the TruEmbroidery™ 3 newsletter. This month we will look at embossing tools in Modify and how to create continuous columns for designs in Create.

Flower Icons

icon

The Embossing tools can be found in the TruE™ 3 or TruE™ Modify Application on the Modify window. A typical use of embossing is to embellish a simple SuperDesign leaf made in TruE™ 3 or TruE™ Studio. The original leaf is shown at the bottom. Take it into Modify to add veins to the leaf, as pictured at top.

Emboss Settings

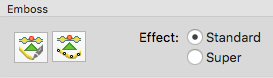
Use Standard or Super Effect to change the prominence of embossed effects. In Standard Effect, when needle points are added, they are not placed close to existing needle points. In Super Effect, when needle points are added, if an existing needle point is found close by, it is removed before adding the new needle point. This creates a heavier impression in the stitched area as more needle points are removed surrounding the embossed line.

Embossed Petals

Use the Emboss Line tools to emboss lines of stitch points on areas of stitching. Use Freehand Tablet Emboss Freehand Tablet Emboss to draw a line to emboss on an area of stitching.
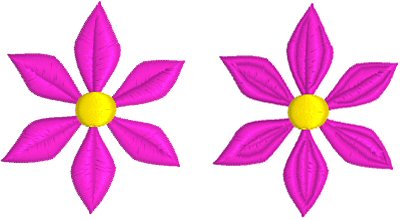
 Use Freehand Point Emboss Freehand Point Emboss to place points to emboss a line on an area of stitching. The original flower is pictured at right, and the embossed flower to the far right.

Flower Tips and Techniques

tips and techniques

This month we will look at how to create a Continuous Column design in the TruE™ 3 or TruE™ Create Application. There are four types of continuous columns available: Continuous Satin Continuous Satin, Feathered Satin Feathered Satin, Richelieu Bars Richelieu Bars or Tapered Motifs Tapered Motif. All four types of continuous column are created in the same manner.

To make a continuous column, use the following steps...

  • Nodes
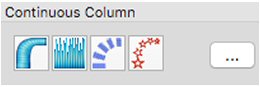
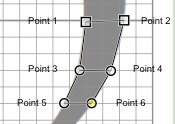
Select the desired column type, then click on the work area to place the first point in the column.
  • Click to place Point 2 to start the other side of the column. A line appears to indicate the width of the column.
  • Click to place Points 3 and 4 for the next section of the column. The first column section appears.
  • Repeat to place points indicating the width and position of the column.
  • Press Return to complete the column. It appears in the work area.
  • Control-click and choose Finish Continuous Column to deselect continuous column, or simply select another Create tool.
  • If desired, Control-click the column to open the Continuous Column dialog and change the settings, or to choose a different column type from the popup menu.
Continuous Satin

Use Continuous Satin Continuous Satin to place a column of straight or curving satin in the work area. The satin is formed from zigzag stitches that fill the column from one side to the other. Use the Continuous Satin dialog to set density, compensation, pattern (for columns wider than around 8-10mm) and underlay.

Feathered Satin

Use Feathered Satin Feathered Satin to create columns of satin that are feathered on one, or both sides. A Feathered Satin column uses zigzag stitches where the start and end points of the stitches are random rather than all parallel. Create feathered satin for realistic feathers or fur in animal designs, or shading in flowers. Typical shapes are arches, semicircles, circles and ovals, and squares, rectangles and triangles are also possible. Use the Feathered Satin dialog to set density, Feather Type, and Stitch Length.

Richelieu Bars

Use Richelieu Bars Richelieu Bars to place bars in the work area. Richelieu bars are short sections of satin set perpendicular to the direction of the column. They are often used in lace designs. Use the Richelieu Bars dialog to set the width and density of the satin bars, the gap between the bars, and the number of bars.

Tapered Motifs

Use Tapered Motifs Tapered Motif to create a line of motifs that varies in size according to the width of the column. Tapered motifs are often used in lace designs. Use the Tapered Motifs dialog to set the motif type, stitch type, and placement method.

Best wishes from TruEmbroidery™ 3 Software

P.S. Watch for the TruEmbroidery™ newsletter next month when we will look at Tie On and Tie Off tools in Modify and how to use Filters in Create.