TruEmbroidery™ 3 Software Newsletter March 2016
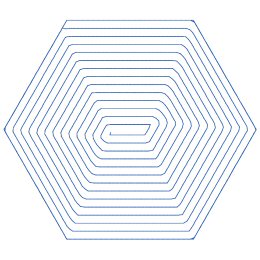
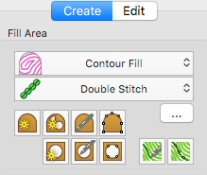
Welcome to the TruEmbroidery™ 3 newsletter. This month we will look at the Get Length of Area tool and how to create a contour fill design.
 Icons
Icons
The Get Length of Area tool ![]() in TruEmbroidery™ 3 Software makes it easy to determine the distance between any two points on an embroidery. For example, you may use it to obtain the width of a column of stitches or the distance between lines of stitching.
in TruEmbroidery™ 3 Software makes it easy to determine the distance between any two points on an embroidery. For example, you may use it to obtain the width of a column of stitches or the distance between lines of stitching.
The Get Length of Area ![]() tool is new to TruEmbroidery™ 3 software. It can be found on the Modify Window of the TruE™ 3 Studio application or the Design Window of the TruE™ 3 Modify application.
The length is shown in millimeters or inches, according to the setting for Show Measurements in TruE™ 3 Configure. The alternative units are shown in parentheses.
tool is new to TruEmbroidery™ 3 software. It can be found on the Modify Window of the TruE™ 3 Studio application or the Design Window of the TruE™ 3 Modify application.
The length is shown in millimeters or inches, according to the setting for Show Measurements in TruE™ 3 Configure. The alternative units are shown in parentheses.
To measure a section of an embroidery, first open a design. In the Modify window of the Control Panel, click Get Length ![]() .
The pointer changes to the measure pointer
.
The pointer changes to the measure pointer ![]() . Left-click, then drag across the part of the design you want to measure. A line shows the length you are measuring, and a tooltip displays the distance.
If desired, make a note of the number. Drag to measure any other distances, as required. Control-click, and choose "Finish Get Length" to deselect the function.
. Left-click, then drag across the part of the design you want to measure. A line shows the length you are measuring, and a tooltip displays the distance.
If desired, make a note of the number. Drag to measure any other distances, as required. Control-click, and choose "Finish Get Length" to deselect the function.
 Tips and Techniques