Tips and Techniques
Let's explore some ways to utilize the Alignment tools in the Design menu in TruE™ 3 Studio.
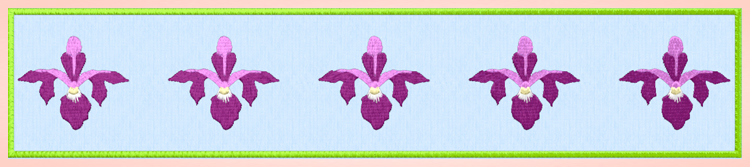
Create a uniform horizontal border design from a single iris embroidery with an even baseline and
equal spacing, using the Alignment tools.
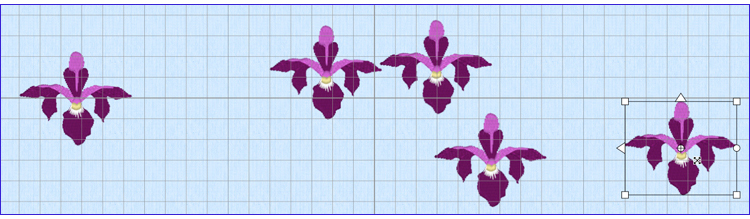
The illustration below shows Iris Single from the TruEmbroidery3 Samples/Studio/Stitch 2/Flowers subfolder,
duplicated 4 times to produce 5 designs. To make a uniform horizontal border design from these flowers with an even
baseline and equal spacing, use the Alignment tools from the Design menu at the top of the work area.
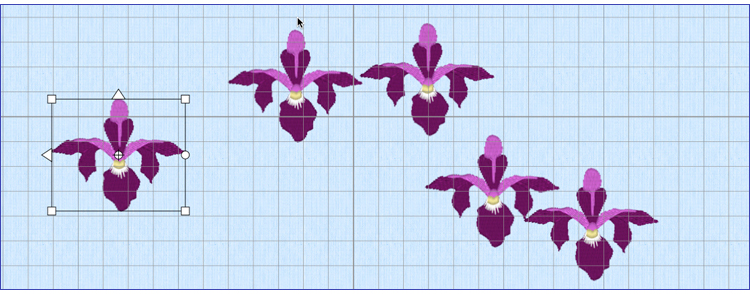
The design to appear at the far left of the border should be selected and moved to the left side of the hoop, to define the placement of the left-most side of the border elements.
Tip: Horizontal alignment and distribution will be determined by the position of the left-most and right-most elements in a selected group,
no matter in what order they stitch. The left-most design doesn't have to be the first design to stitch in the sequence, as stitch order is determined
by how the designs were loaded or duplicated. However, stitch order can later be changed to improve design stitch-out by selecting the Design Menu and Layout tools.
The design that should stitch at the right-most side in the border should be moved to the right side of the hoop,
making sure there is adequate space for the remaining designs to form an attractive border once they are equally distributed,
and the distance between the left and right designs is the correct length for the finished border.
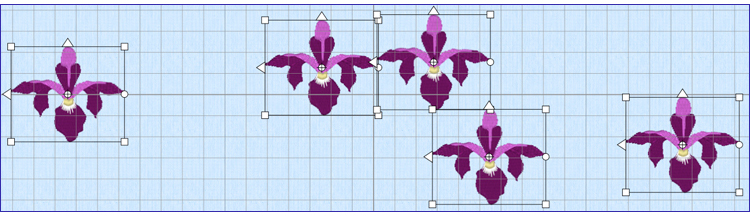
Lining up the flowers to a baseline isn't necessary at this point, as the Alignment tools will automatically adjust them!
All designs to be part of the border series should be selected at this time, so they are surrounded by selection boxes.
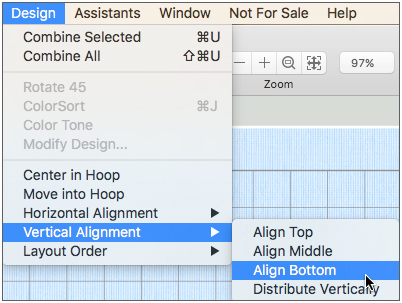 To align all the designs on a single baseline, select the Design menu at the top of the work area, Vertical Alignment,
and Align Bottom. Other options include Align Top (to the top of each design's select box) and Align Middle (along the vertical axis of the select box).
To align all the designs on a single baseline, select the Design menu at the top of the work area, Vertical Alignment,
and Align Bottom. Other options include Align Top (to the top of each design's select box) and Align Middle (along the vertical axis of the select box).
The designs are all aligned along a common baseline but not evenly spaced between the left-most and right-most design in the set.

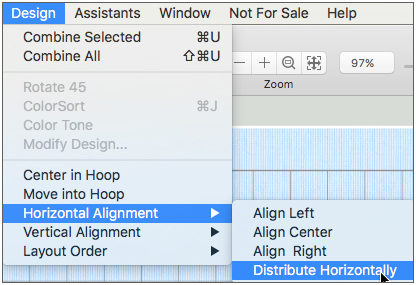 To evenly space the designs between the left-most and right-most embroideries, select the Design menu, Horizontal Alignment,
and then Distribute Horizontally. The selected designs will be equally distributed between the left-most and right-most designs.
To evenly space the designs between the left-most and right-most embroideries, select the Design menu, Horizontal Alignment,
and then Distribute Horizontally. The selected designs will be equally distributed between the left-most and right-most designs.

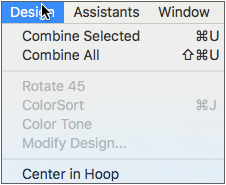 Centering the designs in the hoop will aid the placement when you hoop fabric to stitch the border.
To center, select the Design menu, then Center in Hoop. All selected designs will retain their relative positions
to each other as the entire selected set will move to the horizontal and vertical center of the hoop.
Centering the designs in the hoop will aid the placement when you hoop fabric to stitch the border.
To center, select the Design menu, then Center in Hoop. All selected designs will retain their relative positions
to each other as the entire selected set will move to the horizontal and vertical center of the hoop.
Alignment tools are extremely useful when working with multiple individual embroidery designs (such as purchased letter sets sold as 'Fonts'),
to help establish even placement along a baseline, and to create even distribution (kerning) of the space between individual letter elements.
Don't forget to visit the TruEmbroidery™ 3 folder and the Guides, to learn more about using the Vertical Alignment tools in the TruE™ 3 Studio software!

 , and the Alignment tools in TruE™ 3 Studio.
 Icons
Icons that shows the current percentage of zoom.
The slider button can be dragged left to zoom out or right to zoom in. The small line above the
center of the Zoom Slider
that shows the current percentage of zoom.
The slider button can be dragged left to zoom out or right to zoom in. The small line above the
center of the Zoom Slider  indicates 100% zoom, or the real size of the design.