Tips and Techniques
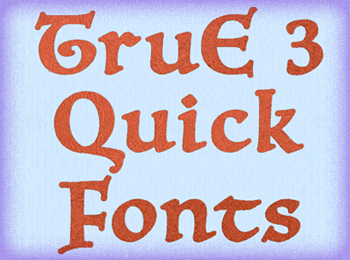
This month we will step through some of the QuickFont options, and review how to make a System Font that can be accessed from the Letter page of the Design Panel in TruE™ 3 Studio
When you open the QuickFont Application  from Launchpad or from a custom shortcut you have created on the Dock, the Select Font window offers Font and Typeface selection menus.
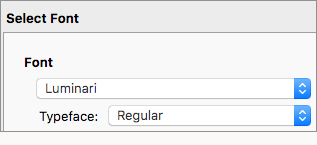
Open  the Font menu to scroll through all TrueType® and OpenType® fonts available on your computer.
Once you select a Font, open the Typeface menu to see if more than one typeface is available for that font. Many fonts include Regular, Bold, Italic, and Bold Italic options. Some only have one Typeface.
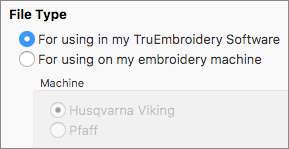
In File Type, you can select either 'For using in my TruEmbroidery Software' to add the new font to the Letter panel in TruE™ 3 Studio, or 'For using on my embroidery machine' for the specific brands shown in the Machine list.
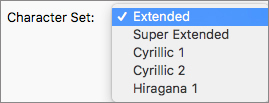
Open Character Set to see the specific sets of characters available in your selected font. Character sets vary from font to font.
Continue  to advance to Set Stitch Options.
Stitch Type has a choice of 6 different stitches.
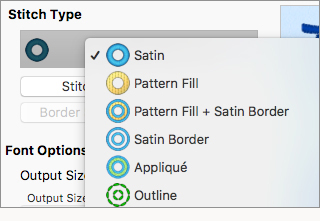
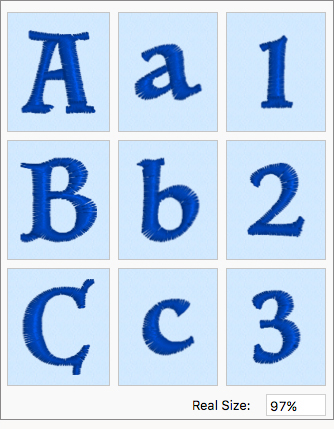
Once you select a Stitch Type, the preview window updates to show a live stitch view, and the Real Size percentage of your preview is shown under the preview window.
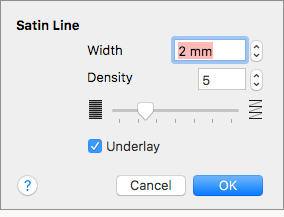
Satin and Pattern Fill Stitch Types have Stitch Options settings  , so you can set the stitch properties to suit the projects for which you plan to use the font.

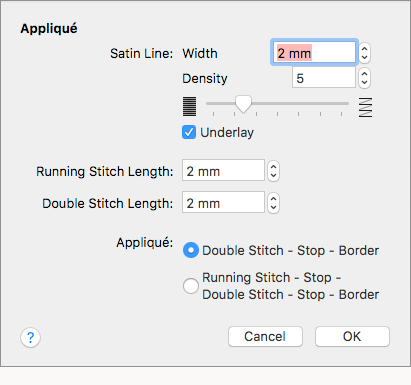
Satin Border, Appliqué and Outline use Border Stitch Options  so you can set the unique properties used in an Appliquéd letter, or other border type stitches.
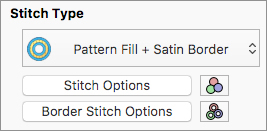
Pattern Fill + Satin Border has both Stitch Options and Border Stitch Options.
Tip: When making Appliqué in TruE™ 3 QuickFont, Appliqué placement steps use Stop or Halt commands rather than thread color changes. If your brand of embroidery machine does not recognize Stop commands (and doesn't stop when you have created Appliqué lettering), open the letters in TruE™ 3 Modify to remove the Stop commands and add additional Color Changes.
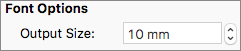
Font Options, which specify the size of the font set, change for Machine Fonts or System Fonts. Available Font Options change, depending on whether you are making a Quick Font for TruE™ 3 Studio or for a sewing and embroidery machine.
When you select an embroidery machine, you set a specific Output Size to make the font set, which will load into the embroidery machine.
When you make a System Font for the Letter page in TruE™ 3 Studio, you can set a Minimum and Maximum Output Size Range, which determine the optimal size to make this set of letters in the TruE™ 3 Studio application.
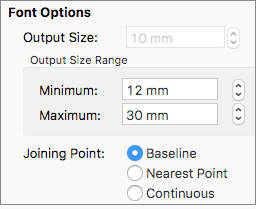
When you make a System Font, the default Output Size Range will change with the selected Stitch Type.
For example, Satin lettering will default to a smaller size range than Pattern Fill, which looks nicest when the letters are large enough to display the pattern's texture.
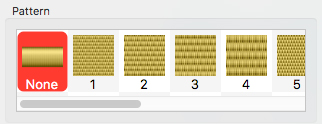
Tip: To make large Satin fonts, try selecting from one of the 12 textures available in the Stitch Options to avoid long satin stitches that might snag.
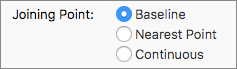
You can also select a Joining Point for the letters.
- Baseline connects one letter to the next at the bottom or base of the lettering.
- Nearest Point connects letters wherever they are closest.
- Continuous optimizes Script fonts so they connect like handwriting.
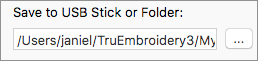
Continue to move to the Output Options. Output Options specify where and with what name to save the Quick Font.
Here, you can Save to USB Stick or Folder if creating your Fonts for an embroidery machine.
If you are making a System Font for TruE™ 3 Studio, Save Font File specifies a Font Name based on
the Font name and Typeface, Character Set, and Minimum and Maximum Size Range. You can add to or overwrite the name if you wish.
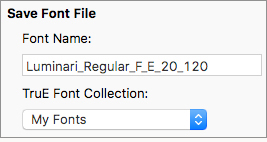
TruE Font Collection specifies My Fonts (unless you made a Script font). My Fonts is recommended for all Quick Fonts so you can easily identify them as fonts you have made!
Print Catalog  shows a preview of the characters that are included in your new Quick Font!
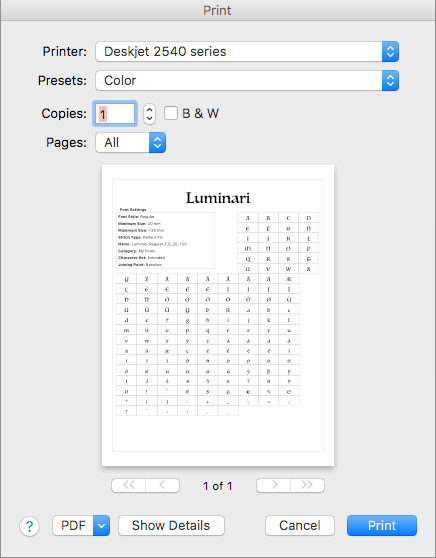
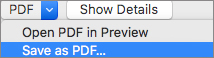
The Printer is your computer's default printer. You can also opt to print to a PDF, and save the reference sheet for future printing!
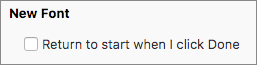
If you plan to create an additional font or two, select 'Return to start when I click Done' in New Font.
Select Done and you are ready to open your new Font set in TruETM 3 Studio's Letter page in the Control Panel!

 Icons
Icons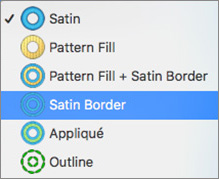 Within QuickFont, six Stitch Type icons are:
Satin
Within QuickFont, six Stitch Type icons are:
Satin  ,
Pattern Fill
,
Pattern Fill  ,
Pattern Fill + Satin Border
,
Pattern Fill + Satin Border  ,
Satin Border
,
Satin Border  ,
Appliqué
,
Appliqué  ,
and Outline
,
and Outline  .
. to change the color of the Pattern Fill or Satin Columns;
Border Stitch Options
to change the color of the Pattern Fill or Satin Columns;
Border Stitch Options  to change the color of the border or outline; and
Print Catalog
to change the color of the border or outline; and
Print Catalog  for a detailed explanation of all the icons, and how to create and save a new System Font.