Tips and Techniques
This month we will explore how to use the Encore function, found in TruE™ 3 Studio, part of the TruEmbroidery™ 3 ELITE and ELEMENTS packages.
To select designs, hold down the Command  key as you click, or use
and press the letter A to select all designs in the work area.
key as you click, or use
and press the letter A to select all designs in the work area.
In the Control Panel  , click Encore
  to open the Encore window.
Once you have opened designs, they must be box selected to make an Encore.
Select the designs in the work area to include in the Encore by holding down the Command key as you click to select the designs.
To select all the designs in the work area, use and the keyboard letter A.
to open the Encore window.
Once you have opened designs, they must be box selected to make an Encore.
Select the designs in the work area to include in the Encore by holding down the Command key as you click to select the designs.
To select all the designs in the work area, use and the keyboard letter A.
The designs used to illustrate Encore in Tips and Techniques are from the TruEmbroidery3>Samples>Studio>Stitch2>Leisure folder, found in the Home folder.
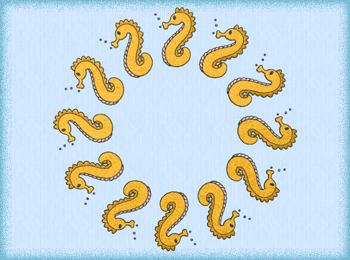
Encore to Circle
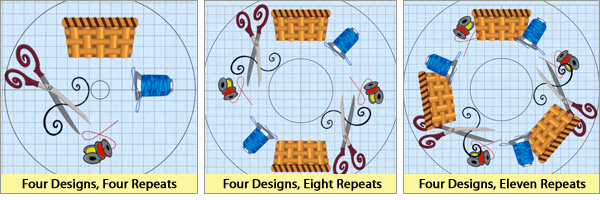
When making an Encore to Circle  in Type, you may select one or more embroideries to repeat in the Encore.
Designs will be placed within the Encore in the order they are opened in TruE™ 3 Studio,
and will repeat if the number of Repeats
in Type, you may select one or more embroideries to repeat in the Encore.
Designs will be placed within the Encore in the order they are opened in TruE™ 3 Studio,
and will repeat if the number of Repeats  is greater than the number of designs selected, repeating in the same layout order.
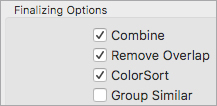 Select Finalizing Options as desired.
- Combine will merge all the designs into a single new embroidery.Use Combine if you don’t want to adjust the final elements individually. Uncheck Combine and you can select individual designs to flip, rotate, or reposition.
- Remove Overlap will crop away dense areas of stitches that underlap other embroidery elements, to eliminate multiple layers of overlapping stitches.
- ColorSort will combine thread stops where applicable to reduce the number of times you need to change threads during stitching. ColorSort will not remove color changes if they are needed to maintain the integrity of the design stitch-out.
- Group Similar will group individual designs together when using multiple embroideries that are overlapped, to optimize the results from ColorSort without changing the appearance of the embroidery.
In Position, select Standard  when you want all the embroideries to face the same direction.
Use Mirrored
when you want all the embroideries to face the same direction.
Use Mirrored  to mirror every other design so every other design mirrors, creating pairs of designs facing each other.
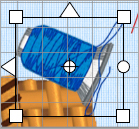
To view how your Encore will look, select Preview. Adjust the size of the circle by holding the cursor inside the ring to see an adjust circle cursor  ,
then click and drag toward the center to make the circle smaller, or away from the center to make the circle larger. The designs will automatically adjust to fit within the new circle.
,
then click and drag toward the center to make the circle smaller, or away from the center to make the circle larger. The designs will automatically adjust to fit within the new circle.
- To move the entire previewed Encore, put the cursor in the open center of the circle
 and drag into a new position.
- Remember, all the elements must be within the work area, represented by the background grid in the hoop, or you won’t be able to Export to stitch your embroidery! However, the Preview select circle line can extend outside the hoop, as long as the designs themselves are within the size of the hoop limitations.
If you decide you don’t like the combination of designs, or the order in which they Encore, use Cancel to close without creating the Encored embroidery.
If you are happy with the combination and adjustment of the Circle, click Apply to finalize the Encore using your selected options.
Once you click apply, the circle preview lines will disappear, and the encore will have a single select box if you chose to Combine,
or each element will have its own select box if you unchecked Combine in Finalizing Options.
 TIP: If you unchecked Combine, you can deselect all the designs by clicking outside them in the work area.
To scroll through many overlapping designs, hold down
Command
and use the keyboard left and right arrows to scroll through the designs backward or forward! Each individual select box has
Flip horizontal
TIP: If you unchecked Combine, you can deselect all the designs by clicking outside them in the work area.
To scroll through many overlapping designs, hold down
Command
and use the keyboard left and right arrows to scroll through the designs backward or forward! Each individual select box has
Flip horizontal  vertical
  and Rotate
  handles.
Encore to Line
 Encore to Line
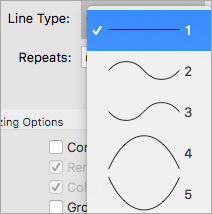
  can also utilize multiple selected embroidery designs.
Choose from 8 Line Types, the number of Repeats in the line (5 shown below), and Finalizing Options as preferred.
Click Preview, and use the Zoom Slider
can also utilize multiple selected embroidery designs.
Choose from 8 Line Types, the number of Repeats in the line (5 shown below), and Finalizing Options as preferred.
Click Preview, and use the Zoom Slider  to adjust the view if the design is initially too large for the hoop.
Adjust the design size with the green handles on the top and side of the Preview box, or click and drag to move the entire boxed Preview.
to adjust the view if the design is initially too large for the hoop.
Adjust the design size with the green handles on the top and side of the Preview box, or click and drag to move the entire boxed Preview.

Be sure to Apply, and then Save and Export as desired for stitching!
Encore to Shape
 Encore to Shape
  can repeat one or two selected designs.
Select one of 28 Shapes. The spool and bobbin design is shown with Shape 13
can repeat one or two selected designs.
Select one of 28 Shapes. The spool and bobbin design is shown with Shape 13 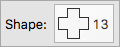 .
.
-
If two designs are selected, the first design loaded into the work area (first in stitch order) will appear at the corners of the shapes.
Use Remove Corners when working with a single design element to make a softer shaping.
Adjust Gap to change the spacing between repeats. Gap shown here is 1mm.
Preview to see how the Encore forms.
Adjust the Encore height and width with the green handles at top and side.
- Elements will repeat as space allows, so changing the size of the Preview box will adjust the number of repeats of each design accordingly.
- Hold the Option key (
 / alt) and adjust to keep the shape proportional.
Apply before saving and exporting!
Encore to Hoop
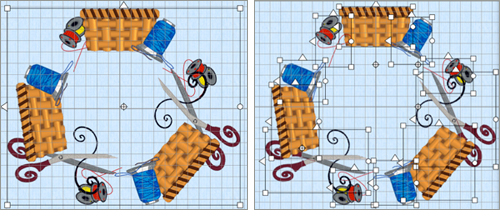
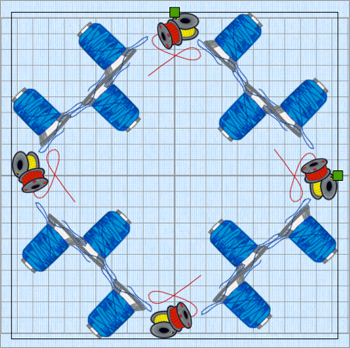
To create a fast border for a selected hoop size, use Encore to Hoop  . One or two embroideries can be selected to Encore.
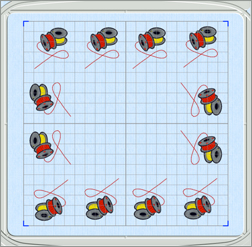 Options include Gap, or spacing between design repeats, Margin, or spacing between designs and the edge of the hoop’s stitch area, and Remove Corners.
TIP: If you want to change how the corner elements are oriented, uncheck Combine in the Finalizing Options before you Apply.
The bobbin design shown was made in a 200mm x 200mm Hoop. Options are set to Gap 5, Margin 0, and Finalize Options to uncheck Combine.
Corner designs were selected and rotated individually to give a more uniform visual appearance to the design.
If you haven’t used Encore, try using some of the SuperDesign elements to create a nifty Encore to Hoop border for a quilt label, or Encore to Line to add a quick border to some fun kitchen curtains!

 Icons
Icons to see how the Encored design looks without finalizing,
so you can make changes to get just the look you desire. Use
Cancel
to see how the Encored design looks without finalizing,
so you can make changes to get just the look you desire. Use
Cancel  to close without making an Encore. Use
Apply
to close without making an Encore. Use
Apply  to finalize the current Preview of your Encored designs.