 Tips and Techniques
This month we will look at what the types of PhotoStitch are,
and the effects they produce, so you can quickly find the best Type for your photo or image!
When you select Assistants and then PhotoStitch, the two size options are PhotoStitch into Hoop or PhotoStitch into Rectangle.
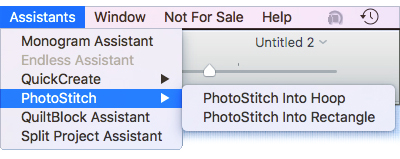 To maximize the design to the currently selected hoop with the photo you have chosen,
select PhotoStitch Into Hoop. The stitches will fill the hoop's width and/or height,
depending on how the image's proportions match the hoop's height / width proportions.
Once you select PhotoStitch Into Hoop, the PhotoStitch Assistant will open.
To maximize the design to the currently selected hoop with the photo you have chosen,
select PhotoStitch Into Hoop. The stitches will fill the hoop's width and/or height,
depending on how the image's proportions match the hoop's height / width proportions.
Once you select PhotoStitch Into Hoop, the PhotoStitch Assistant will open.
To specify a specific area within the hoop area, select PhotoStitch into Rectangle.
Once selected, the cursor shows a select box. Drag to make the box the size you need, and when you release the cursor the PhotoStitch Assistant opens.
Tip: If you use PhotoStitch Into Rectangle, and don't at first capture the area you want to use, just select
Quit  in the Embroidery Type window, and start again.
In the PhotoStitch Assistant, Choose Embroidery Type window, select from five styles of PhotoStitch.
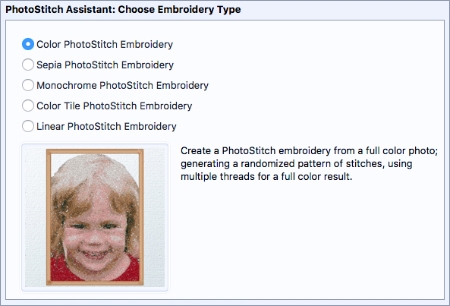
Notice a short description and a preview of the stitch type appear as you change the selection.
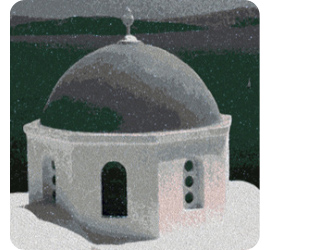
Color PhotoStitch Embroidery uses an all-over random stitch that simulates thread painting, and maps color in the image to threads in the thread database.
- Color PhotoStitch is quite useful for color photos of people, landscapes, pets, and other detailed images.
- Select an image with good contrast between the subject and the background, without shadows in critical areas (such as in the facial area), and without too many unnecessary details.
- For example, you'll see more detail in a PhotoSitch from a close-up photo than from a fuzzy far-away subject shot against a large background.
|

|
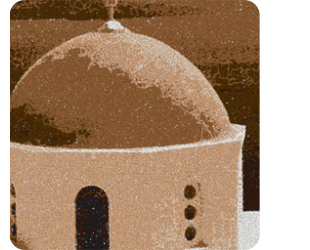
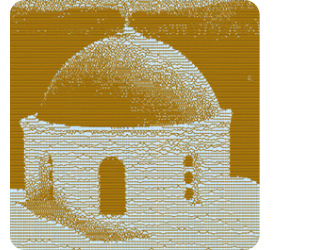
Sepia PhotoStitch Embroidery maps Sepia tones to black-and-white photos or to color images to make a free-motion style stitch.
- Sepia tones include creams, browns, tans, and other tints and shades of warm reddish brown.
- Sepia PhotoStitch works well on black-and-white or sepia-toned photos to produce a vintage look in warm, earthy tones.
- Sepia will often render finer detail in older or faded color photos.
|
|
Monochrome PhotoStitch Embroidery creates thread-paint style stitches in blacks, grays, whites and some other light neutrals.
- Use for a nice result from black-and-white photos.
|
|
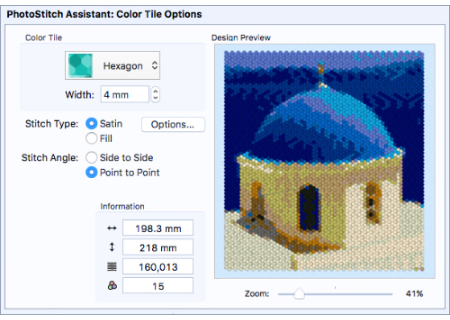
Use Color Tile PhotoStitch Embroidery to generate stitches in small blocks or tiled shapes that suggest a hand-worked look like needlepoint.
|
Linear PhotoStitch Embroidery is a novelty stitch, and can use either color or black-and-white images.
- Images are translated into lines of stitches at variable angles, and stitch in a single color of thread.
The PhotoStitch Assistant's first steps are very similar for all types of PhotoStitch.
Load an image, use the editing tools to adjust the background or crop to a smaller area of the image, and then adjust the specific properties for the type of stitch you selected.
|
|
Select Help  from any window to open a link to specific information about your currently selected process, or access the TruE™ 3
Studio User Guide or Reference Guide for more instruction on working in PhotoStitch.
PDF copies of Guides are found in the Home >TruEmbroidery 3 > Guides folders. You'll find some great tutorials stepping you through the many facets of PhotoStitch designing!
from any window to open a link to specific information about your currently selected process, or access the TruE™ 3
Studio User Guide or Reference Guide for more instruction on working in PhotoStitch.
PDF copies of Guides are found in the Home >TruEmbroidery 3 > Guides folders. You'll find some great tutorials stepping you through the many facets of PhotoStitch designing!
Some General Tips:
- Use well-defined photos with strong contrast and avoid blurry or over-detailed images for best results.
- When possible, make the PhotoStitch to fit larger hoop sizes. The larger the embroidery, the better the details will pop out.
- Try using fewer thread colors if your portrait is very detailed. Reducing the number of thread colors will filter out some of the detail.
Experiment with the Number Of Threads, and then Apply to see the updated Thread Color Preview.
The image used to illustrate the styles is
Santorini.jpg from your Home folder
>TruEmbroidery3 >Samples >PhotoSt >Pics2 >Landscapes.

 Icons
Icons ,
Large Eraser
,
Large Eraser  ,
Medium Eraser
,
Medium Eraser  ,
and Small Eraser
,
and Small Eraser  are used to remove background or other unwanted areas from an image, so stitches won't be formed in those areas.
 shows the current number of thread colors used to create the PhotoStitch embroidery,
and has arrows
shows the current number of thread colors used to create the PhotoStitch embroidery,
and has arrows  to increase or decrease the thread count.
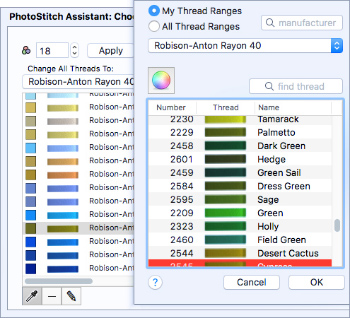 Use Pick New Colors
  to add more threads by clicking within the Source Picture.
Select a color in the Thread List, and then click Delete Selected Color
to add more threads by clicking within the Source Picture.
Select a color in the Thread List, and then click Delete Selected Color  to remove it from the list.
Click Edit Selected Color
to remove it from the list.
Click Edit Selected Color  to open the Thread dialog window to access the thread database and change to a new thread brand or color.
Click Delete All Colors
to open the Thread dialog window to access the thread database and change to a new thread brand or color.
Click Delete All Colors  if you want to remove all the automatically selected colors, and then use the
Pick New Colors
if you want to remove all the automatically selected colors, and then use the
Pick New Colors  ,
Height
,
Height  ,
Number of Stitches
,
Number of Stitches  , and the total number of
thread colors
, and the total number of
thread colors 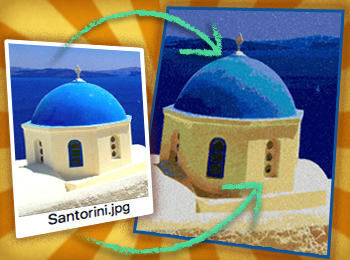
 Watch out next month for the PREMIER+™ 2 newsletter for both Windows and Mac users.